

Hi everyone im in need of sharing my brownie recipe with you, me and my friend made these the other day as i am at home from injuring myself by falling down a flight of steps at a club, resulting in a huge knee injury :( so im having to declare my love for them as they are the most delicious things ive ever made!
Ingredients♥
185g unsalted butter
185g best dark chocolate
85g plain flour
40g cocoa powder
50g white chocolate
50g milk chocolate
3 large eggs
275g golden caster sugar
1. Cut the butter into small cubes and place into a medium, break up the dark chocolate and drop into the boil, place the bowl over a saucepan of boiled water and leave until melted thoroughly, occasionally stir.
2. Turn your oven onto 160C/conventional180C/gas 4 (most ovens take 10-15 minutes to heat up).
Use a shallow tin, and place non stick or greaseproof paper to the bottom of the tin to allow the brownies to come away easily when cooked.
Now tip the flour and cocoa powder into a sieve and sieve into a medium sized bowl until completely mixed together, without any lumps.
3. Using a large sharp knife cut up the milk and white chocolate into small chunks so you end up with rough squares.
4. Break the eggs into a large mixing bowl and tip in the sugar, using a hand, electric whisk or electric cake mixer, whisk until the eggs form a thick white almost milkshake substance, If the mixture that runs off the beaters leaves a trail on the surface of the mixture in the bowl for a second or two, you're there.
5. Pour the cooled chocolate mixture over the eggy mouse then gently fold together using a rubber spatula, continue this until the mixture is a rich brown colour all over.
6. Sift the cocoa and flour mixture into this, gently fold this in with the mixture using the same action as #6 it looks powdery at first but persist until the mixture becomes gungy fudgey looking.
Then stir in the chopped chocolate pieces made earlier.
7. Pour the mixture into the prepared baking tin, spread evenly to look like this:

8. Place into the preheated over and put your timer on for 22-23 minutes, when the buzzer goes of open the over and shake the tin, if the mixture wobbles in the middle then they arent done, leave in the oven for another five minutes, or until the mixture is still, and should be left with a top shiny papery crust:

Take out of the oven and leave until completely cooled.
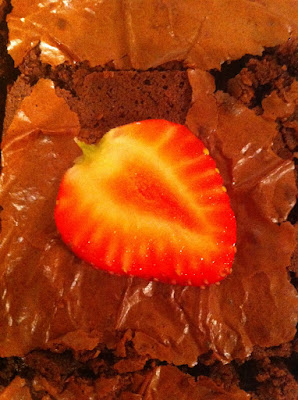
Then cut into desired shapes e.g triangles, squares or even hearts :)

Please anyone who uses this recipe let me know how you got on, and send me some of your photos if you take any.
I hope you all find these as delicious as me my family and friends have :D
my mouth is like watering.
ReplyDeletehave. to. try. this. SOON!
Seriously have to try them, there amazing!!!
ReplyDeletewow if only i can bake. lol it looks soooo good!
ReplyDeleteum, this looks delicioussss. i feel like anytime i make things from scratch... it goes to scratch. thanks for the detailed instructions though!
ReplyDeletewww.bareleopard.blogspot.com
mmmm. those look so good! will be sure to try the recipe!
ReplyDeletexx raez
MMMM!!! Those look and sound sooo good!
ReplyDeletehttp://aclosetfashionista.blogspot.com/
OH MY GOSH
ReplyDeletethat look delish!
xx Black Adder Fashion
http://www.bloglovin.com/en/blog/1840556/black-adder-fashion
looks delish! too bad im on a sugar free, starch free, gluten free, yeast free diet.
ReplyDeletecute blog! they look so good!
ReplyDeleteplease check out my blog and follow it if you like it--> katslovefashion.blogspot.com
oh god these sound so good right now
ReplyDeletedefinitely trying that out! it's looks amazing.
ReplyDelete